F150 Headlight Switch Removal And A/C Evaporator Specifics
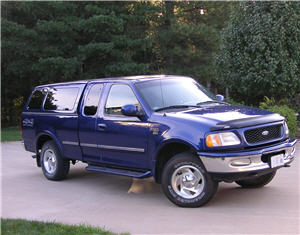
When you keep a vehicle for 15 years and over 250,000 miles you can expect a heater core replacement with a commensurate evaporator core replacement (or vice versa) will have to be done. It’s unfortunate that Ford F150 engineers could not come up with a better way to do that than removing the entire dash in an 8 – 16 hour job, depending.
The YouTube channel RealFixesRealFast has a 3 part series replacing the heater core on an F150 very similar to mine that was extremely helpful. Unfortunately, there is always more to know and his videos left some important points not covered (you just can’t do it all when trying to make how-to videos!).
In fact, I even commented that he almost makes it look TOO easy to the point that some folks might attempt what they are better off to leave alone. And remember, once you get it all torn apart and cannot finish it yourself your two choices are to hire a mechanic to come to your place or have it towed to a shop – it’s not exactly drivable.
Two of the more glaring omissions for me (noted, though, his video was on heater core only, so that resolves 1 of the 2 in a way) are how to remove the headlight switch in a Ford F150 WITHOUT BREAKING IT and the ADDITIONAL STEP of loosening and pulling back the entire heater housing to get the evaporator core out (in one piece) and the new one in (without ruining it).
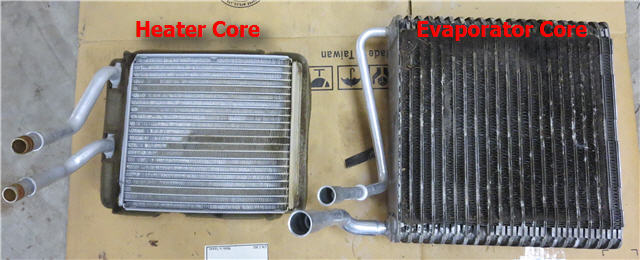
I guess a third omission is him not INSISTING that a person replace BOTH heater core AND evaporator core when either one goes bad. If one is old enough to go bad, so is the other, and just how often do you want to spend a day or two repairing your truck or pay $800 to have someone else tear it apart?
Video Explaining Additional Steps For F150 Evaporator Core Replacement/Tips
The Culprits, Though They Did Last A Long Time!
Ford F150 Headlight Switch Removal
I am guessing that very few people, non-professional mechanics anyway, would successfully guess how to remove a Ford F150 headlight switch without breaking it. I was shown how to do it many years ago when my switch went bad and I still had to dink with it for a little bit before it came back to me.
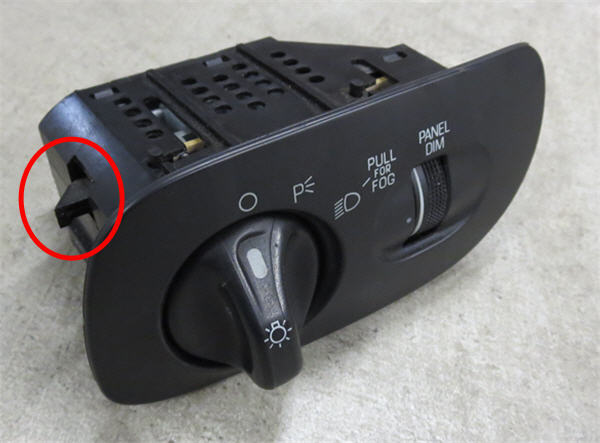
Basically, the procedure to remove the headlight switch from the dash is (remember, the battery has already been disconnected as step one of the heater core/evaporator core replacement):
- Turn headlight switch to on
- Pull the switch out to fog light position
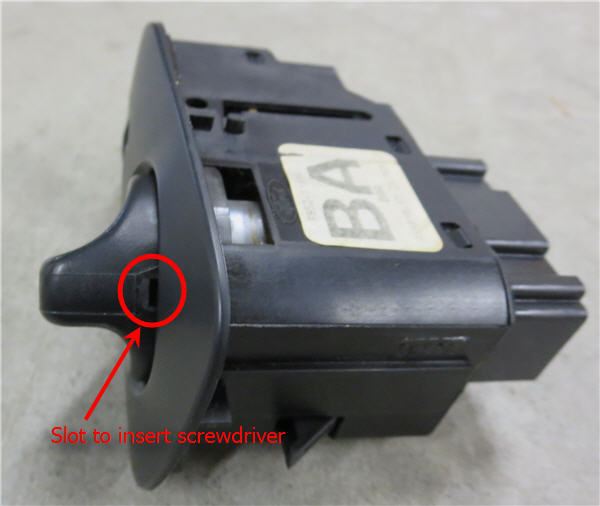
- Insert small screwdriver in the slot now exposed on the back of the knob to release the knob (see photo below)
- Remove knob
- Turn knob 180 degrees and put back on, turning to off position as you do so
- Turn knob right to headlight on position which retracts locking tab (see photo above)
- Remove from dash and disconnect wiring connectors
- (Remove knob – no screwdriver insertion necessary – and replace in normal direction)
So, would you have guessed that on your own or broken it and reached for the super glue?
Heater Housing Photo, Screw Locations
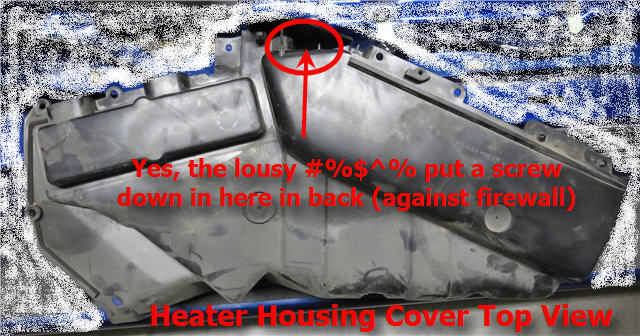
The heater box cover comes off pretty easily, but the engineers did screw us over by putting on last screw in the back against the firewall, down in a hole that you cannot see and will probably be a pain to get back in without dropping it.
This photo is a view of the heater box cover from the top. A couple of those holes in the back are for plastic alignment pins, not screws.
Ford F150 Evaporator Core Replacement
In the RealFixesRealFast series of videos on F150 heater core repair the tech says basically “if your problem is the evaporator core, there it is too”. Not so fast. Again, you should replace BOTH anyway!
The evaporator core WILL NOT COME OUT without loosening and sliding back the entire heater box housing. Fortunately, that’s not TOO bad of a job, just complicated by some idiot Ford engineers who have obviously NEVER attempted this kind of repair themselves.
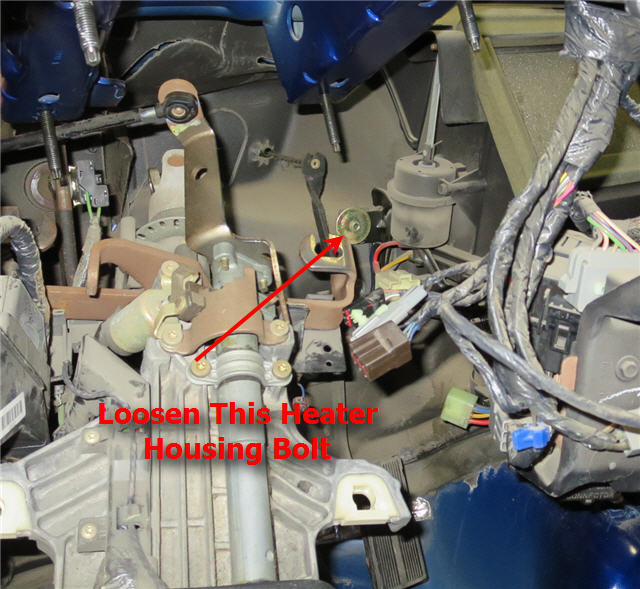
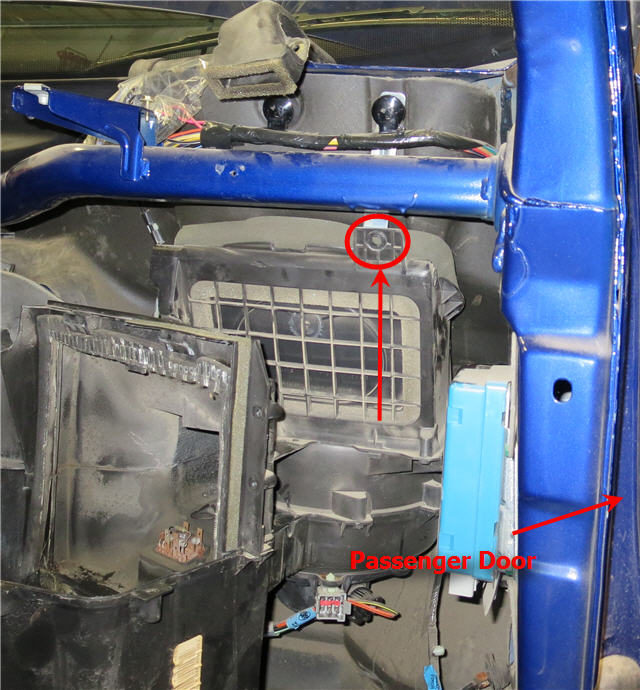
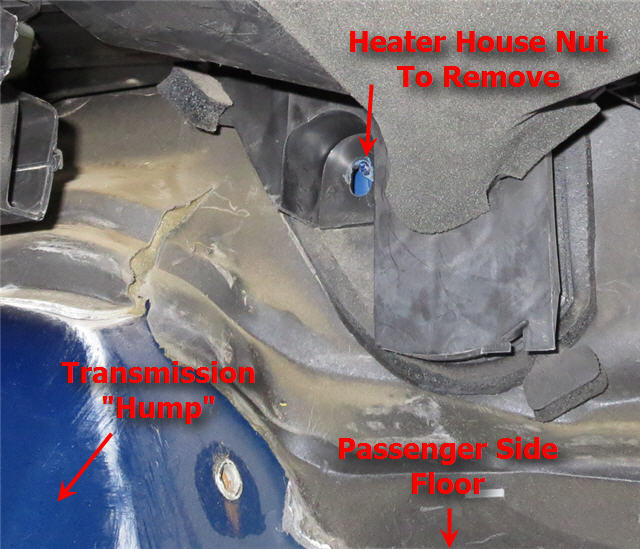
There are just 3 bolts/nuts that need to be loosened or removed inside the truck and 2 under the hood. Unfortunately, one of the ones under the hood has a bracket over it that must be removed requiring you to climb up in the engine compartment with a 10mm deep socket, universal joint, extensions and ratchet to LOOSEN – do NOT remove – a 3rd nut so you can remove the bracket in the way of the other nut.
See the photos:
Inside the cab, 1 on the driver’s side, 2 on the passenger side.
Now let’s climb up in there with the engine.
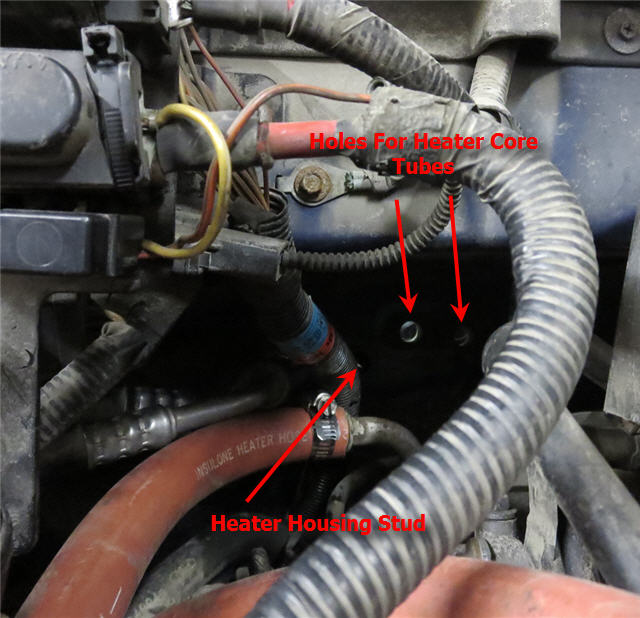
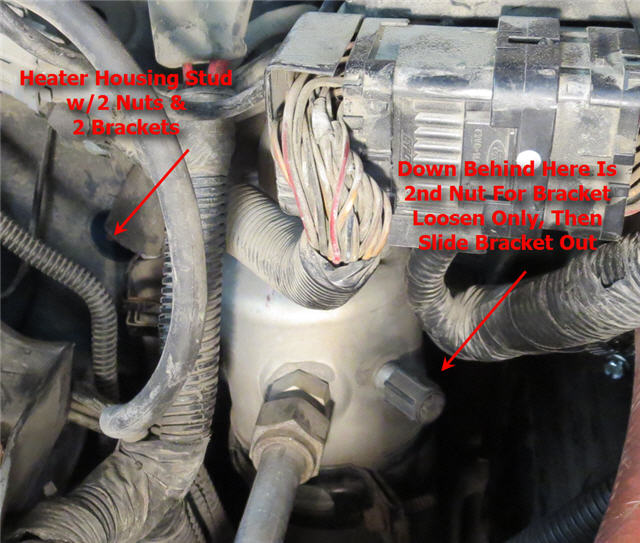
One bracket, two nuts. Different sizes, of course! (Thanks Ford engineers).
First remove the battery, then take off the OUTSIDE nut (11mm) on the stud behind the battery. The bracket holding the A/C hose will flip out of the way. The other slotted bracket for the A/C component will not come off until you LOOSEN (no need to remove and drop or lose) the nut down behind (10mm). The other end of the bracket is also slotted and it will now come off.
Then remove the inner nut and you should be clear to go inside the cab and wiggle the heater box about 1 inch away from the firewall and now get that con-founded evaporator core out (presuming, naturally, that you have had someone remove the freon from the system – if any – and with those special tools disconnect the A/C lines (another contortionist’s job).
Parts I Bought For Repair Job
There are cheaper brands you can get, but considering how big of a job this is I was recommended to – and agreed – that genuine Ford Motorcraft parts would be a good idea.
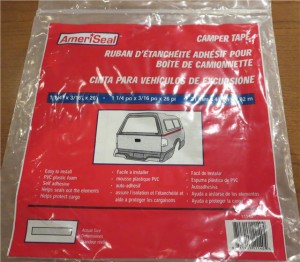
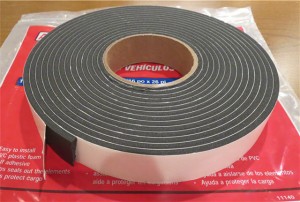
I was disappointed, though that the heater core did NOT come with the wrap around foam. Ameriseal Part#11140 (available at NAPA) is some camper foam that should work. I’ll find out tomorrow I hope. (Edit: Yes it seemed to be fine)
The Ford dealer parts guy told me that the gasket that fits between the evaporator core and the heater box (firewall side) is no longer available from Ford. The bottom portion of mine was stuck to the core and tore off.
I removed it and silicone glued a piece I cut to fit from the camper foam into the housing in its place.
Without that gasket I have heard from several sources that it may well leak inside the cab when it rains.
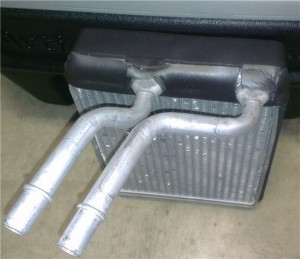
These Parts Fit MY Truck
These are the parts I ordered to fit my truck. This is one thing I like about Amazon automotive, you tell it what vehicle you have and it will tell you if it fits or not! Make sure and get the ones that fit YOUR vehicle!
Get the blend air door like RealFixesRealFast said (I just don’t understand why he didn’t tell viewers to always replace A/C AND heater cores for the same reason he suggested changing the blend door).
Motorcraft YK183 New Evaporator
Problem Installing New Dorman Blend Door
Unfortunately, even after taking an exacto knife and cleaning out the hole for the steel collared Dorman blend door it would still not slide all the way down. What I found is that I had to carve a little off of the bottom “stop collar” so that it would slide all the way down into the corresponding channel in the heater box.
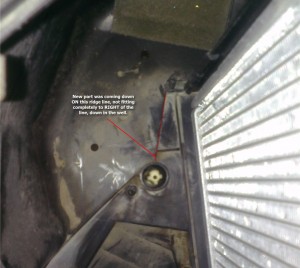
I’m guessing maybe I carved off about 1/8 inch from the semi-circular guide on the bottom of the blend door shaft. Basically, it’s like the guy says in the RealFixesRealFast video, if the blend door is not flush at the top, it’s not in right.
Helpful Tools I Bought
When it comes to taking out trim pieces (without scratching or breaking anything), and those fasteners that I talk about in the video, here are some tools I bought in addition to the heater hose removal tool shown in the RealFixesRealFast video 1:
For removing those heater hoses with “quick” connects, this is the tool shown in the RealFixesRealFast video: Wilmar W83108 HEATER HOSE DISCONNECT TOOL–FORD & CHRY.
Set of plastic trim fastener removal tools: 5 pc. No-Scratch Tools for Removing Fastener & Molding
Metal fastener removal tool I show in my video: Lisle 35260 Plastic Fastener Remover
Additional Resources I Found Helpful
RealFixesRealFast 3 part video series for Ford F150 Heater Core Removal: Part 1, Part 2, Part 3
Word document for 1997 heater core repair (NOT prepared by me), here
Ford F150 Forum thread on heater core repair
Ford F150 Online Forum thread on additional steps (with pics) for F150 evaporator core removal
The Wrap
I put a lot of time and effort into the video, pictures and post; I hope it helps someone. Forums are fantastic and this is one way of giving back for all the help I received from forum threads (old & new) and YouTube videos others have done.
If this did help you, could you please share it up socially? Thanks. And leave a comment too, if you like.
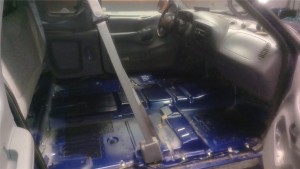
More Pics Of Heater Core Replacement/Evaporator Core Replacement, Interior Removed
With the dash pulled back just far enough to work on:
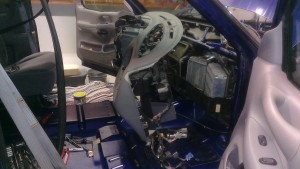
How About Some Pics Of My F150 With The Interior Removed?:
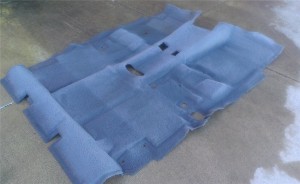
Here is the carpet after being cleaned with dish soap, baking soda and LOTS of WATER!:
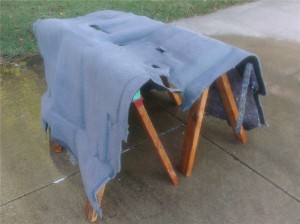
Takes a while to dry, though, especially in ILL-inois in December:
I am Venezuelan. I have Ford Pick UP F-150. motor 4.6L -Mexican.The evaporator is wrong. But, Idon´t can change the evaporator. How can I disconnect water hose warm.?
Thank you, your information is very appreciated.
Caracas, Venezuela.
Watch the videos that we have embedded, the guy covers that. They can be easy or difficult, never know which it will be, but work at it and they come off
Wow this is going to be very helpful my girlfriend has a truck with no heat and I want to make sure she has heat for this winter so it’s time to break out the tools
Thanks for the tips. You undoubtedly saved me a lot of both time and labor not to mention headaches. Concise and very good info. Again, many thanks!
Good video and lots of helpful info on website. Thanks!!!!!
Hello,
I have the pleasure of attempting this job in the next week. I wanted to say thank you for all of your hard work getting this site up for us!!
However, I’m not able to download the step-by-step directions, could you sent that to me?
Thanks in advance!
Did the Ameriseal Part#11140 camper foam work for insulating the heater core?
yes it seemed to do the trick
Cool!! Thanks for getting back to me on that.
Very helpful!
I have a 99 Expedition
Mice got in the entire heater box and chewed everything up…
I purchased it for 600 bucks with wiring problems, ( mice chewed through several wires at the ECM connection behind the battery and a few vacuum lines for HVAP and engine…
Waiting on a new fuel pump to arrive to see if everything engine wise works ok.
I will tackle the heater box next if everything else checks out…
Steve
I really need those instructions. My 98 is being used as a pilot vehicle. I have Saturday (today) and Sunday to get it done. Please email this to me. You or anyone please. [email protected]
Thank you
Thank you sir