Kingston SSD’s combine, performance, cost and convenience in such a way that we feel we are providing great value to the people who hire us.
Check out this video where we take a look at what comes in the box and why we buy the desktop bundle SSD upgrade kit for just a few dollars more than the bare SSD drive. (Yes, I know, “SSD drive” is actually redundant, but it sounds right somehow!)
Again, just to reiterate some important points about using and SSD upgrade to speed up your PC (desktop, laptop – Mac too!, netbook):
- SSD’s have no moving parts so are MUCH FASTER than any conventional hard drive
- SSD’s use less power, create less heat. Especially important in Laptops & Netbooks
- SSD’s work in both Windows PC’s and Mac’s
- SSD’s normally (there may be exceptions) require Windows 7 (or above, click here for Windows 7 Upgrade info) or a recent Mac OS that support the “TRIM” command for “garbage collection”
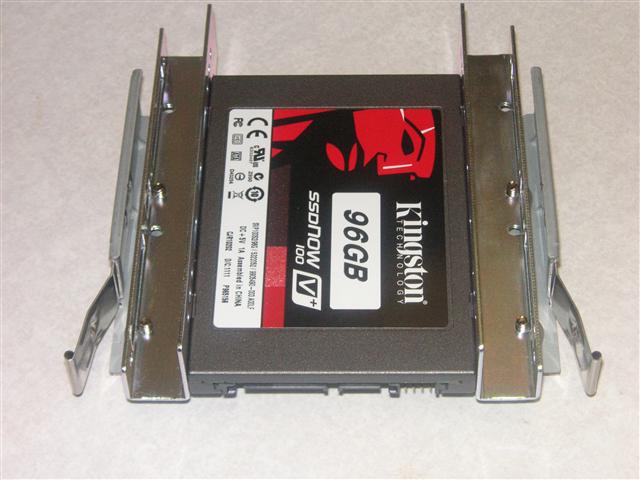
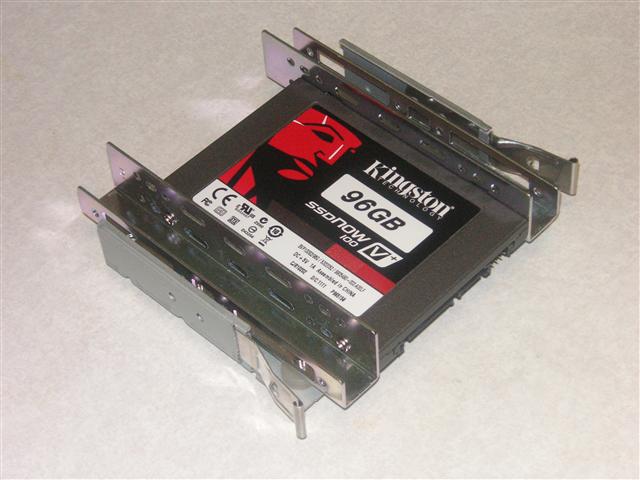
- All SSD’s are in 2.5 in format, which means they fit portable devices exactly, but usually require a set of mounting brackets for a desktop PC (included with the Desktop bundle kit we bought)
- You do NOT need to ever defrag your SSD, and Windows 7 knows not to do it automatically either
Find out more about the Kingston SSDNow V+100 96GB SATA II 3GB/s 2.5 Inch Solid State Drive with Upgrade Bundle Kit SVP100S2B/96GR
Speed Test: New SSD vs 7600rpm Conventional Hard Drive
Since I mentioned this SSD upgrade was intended to speed up the computer, I need to throw in the time tests done with a stopwatch.
What I timed was power-on up through Firefox opening and displaying the Google home page. A Firefox icon was included in the ‘Startup’ folder in the Start Menu of Windows 7 (SP1).
| Seagate 7200.7 7600rpm conventional hard drive: | 59 seconds |
| Kingston SSDNow V+100: | 33 seconds |
As you can see from the table above, the SSD smoked the conventional hard drive, one of the fastest in its class. Boot time was almost cut in half!. And there are more expensive SSD’s that are faster yet.
But here is one more point. This PC has 2GB RAM, and while we will be installing 4GB as soon as it arrives, my experience shows this will not be much of a factor on boot time. The conventional hard drive had the Firefox window open, but some some desktop icons had NOT shown up yet and the drive was “chugging” pretty good for another minute or so.
The SSD, on the other hand, seems responsive after the stopwatch was clicked off – more so than the conventional hard drive.
And THAT is what it’s all about. Speeding up your computer so YOU can get doing what you want to get done more quickly.
The Mechanics of the SSD Upgrade
There are two ways to go about it. One is to buy a new SSD and simply do a clean install of Windows 7 on it. This is what you want to do if your old drive is Windows XP, but also if you feel your Windows 7 is also aging a bit, may have been malware infected or otherwise full of bloat.
The other way is to “clone” your current Windows 7 drive to the new SSD. The Kingston SSDNow desktop bundle comes with Acronis True Image HD which not only will clone your old drive to the new one, but also allow you to create and manage backups down the road.
For the cloning:
- Backup your current drive/data, just to be sure
- Uninstall any programs you KNOW you don’t need, clean temp files and other gunk, possibly using something like CCleaner
- Perhaps move large files (video, music, photos) to another drive if they collectively will not fit on the SSD. A second drive can be perfect for that, even your old drive – but then you cannot ‘clone’ but must either remove for the clone and then copy back or go with the clean install on the SSD
- Either install the SSD along with the old hard drive in your PC or use the (included in the bundle) external USB enclosure for the SSD and connect via USB
- Boot from the CD included in the bundle; most current PC’s allow you to press a key (F8 on the Asus PC’s I’m working with) for a boot menu and select the CD/DVD drive
- Once in Acronis True Image HD, select ‘clone’. They will recommend using ‘automatic’ but quite frankly I’m too paranoid of a screw up so I choose manual
- If your old hard drive is LARGER than your new SSD, there is no problem as long as there is no more data than would fill about 70% of your SSD. Acronis will allow you to select the smaller SSD as the destination of the clone as long as there is room for the data. You can also clone multiple partitions if you like, choosing proportional sizing or manual sizing
- The clone on my system, with both connected internally, only took about 3 minutes for somewhere around 30 GB of drive content.
- Remove the old drive, unless you will keep for additional storage, setup the SSD as the primary boot drive in the PC
- Test!
Find out more about the Kingston SSDNow V+100 96GB SATA II 3GB/s 2.5 Inch Solid State Drive with Upgrade Bundle Kit SVP100S2B/96GR
Photos of SSD Kit Installation
Here are some photos of the Kingston SSD in the included mounting brackets and installed in the shock absorbing hard drive tray of the desktop (tower) PC:


Awesome write-up, Roger. I appreciate the focus of your review…very to-the-point and informative. Keep up the great work.
Thanks!